| Tabs Page |
|---|
| id | Description |
|---|
| title | Description |
|---|
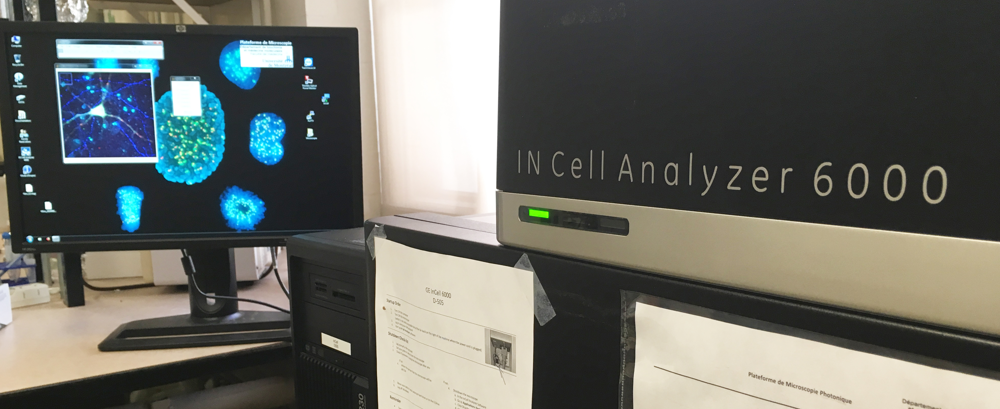
| GE InCell Analyzer 6000 High content microscopeJA Bombardier Building, Room 3129
Instrument awarded to Dr. Steve Michnick by the Canadian Foundation for Innovation (CFI) Advanced Microscope Tier 2 usage price - Applications
- Transmitted light
- Pseudo phase contrast and DIC
- Fluorescence
- High-throughput imaging
- Long-term imaging
Light sources
| Développer |
|---|
| title | Toptica iChrome specifications |
|---|
|
| Source | Polychroic | Excitation wavelength (nm) | Compatible fluorophores | Nominal Power
(mW) |
|---|
| 405nm | 390/40 | [370-410] | DAPI, Hoechst | 50 | | 488nm | 482/18 | [473-491] | FITC, GFP, YFP | 25 | | 561nm | | [559-569] | Cy3, DsRed, TxRed | 30 | | 642nm | 640/14 | [632-647] | Cy5, Cy5.5 | 50 |
|
Objectives - 10x/0.45 Air WD 4.0
- 20x/0.75 Air WD 1.0
- 40x/0.6 Air WD 2.7-3.7
- 60x/0.95 Air WD 0.15
| Développer |
|---|
| title | Objective specifications |
|---|
|
| Position | Name | Brand | Full name | Identifier | Workinf distance (mm) | Transmittance
(% [nm]) | Technic | Coverslip thickness (mm) |
|---|
| 1 | 10x/0.45 Air | Nikon | 10x/0.45 Air
Plan Apo
M25x0.75 | MRD00101 | 4.0 | >80% [TBD-TBD] | BF, p-PhC, p-DIC, Fluo | 0.17 | | 2 | 20x/0.75 Air | Nikon | 20x/0.75 Air
Plan Apo
DIC N2
M25x0.75 | MRD00201 | 1.0 | >80% [TBD-TBD] | BF, p-PhC, p-DIC, Fluo | 0.17 | | 3 | | Nikon | 40x/0.6 Air
Plan Fluor ELWD
M25x0.75 | MRH08430 | 2.7-3.7 | >80% [TBD-TBD] | BF, p-PhC, p-DIC, Fluo | 0.17 | | 4 | 60x/0.95 Air | Nikon | 60x/0.95 Air
Plan Apo
M25x0.75 | MRD00600 | 0.15 | >80% [TBD-TBD] | BF, p-PhC, p-DIC, Fluo | 0.17 |
BF: Bright-field
p-PhC: Pseudo-phase contrast
p-DIC: Pseudo-Differetial interference contrast |
- Filters
DAPI GFP Cy3 Cy5 - Cy5.5
| Développer |
|---|
| title | Filter specifications |
|---|
|
| Position | Name | Brand | Identifier | Polychroic (Transmission) | Emission filter | Efective bandwith (nm) |
|---|
| 1 | DAPI | TBD | TBD | BP 420/20
[430-462] | 455/50
[430-480] | [430-480] | | 2 | GFP | TBD | TBD | BP 446/32; 524/42; 600/36; 732/137 | 525/20
[515-535] | [515-535] | | 3 | Cy3 | TBD | TBD | BP 446/32; 524/42; 600/36; 732/137 | 605/52
[579-631] | [582-618] | | 4 | Cy5 | TBD | TBD | BP 446/32; 524/42; 600/36; 732/137 | 707/72
[671-743] | [671-743] | | 5 | Cy5.5 | TBD | TBD | BP 446/32; 524/42; 600/36; 732/137 | 720/60
[690-750] | [690-750] |
|
- Detector
- sCMOS Monochrome 2560 x 2160 pixels, 16-bit, pixel 6.5um x 6.5um, sensor 16.6mm x 14.0mm
|
| Tabs Page |
|---|
| id | User Guide |
|---|
| title | User guide |
|---|
|
| UI Expand |
|---|
| If necessary, turn on the microscope (#1) | Info |
|---|
| The switch is not easily accessible and is located on the back of the right side of the device. |
- If necessary, turn on the computer (#2)
- Use your UdeM credentials to log in to Windows
Start the software IN Cell Analyzer 6000
|
| UI Expand |
|---|
| Within the software IN Cell Analyzer: - Click Eject to open the access door
- Insert your sample in the space provided for this purpose, respecting the orientation indicated
Click Load to close the access doors
| Remarque |
|---|
| For use with the 60x objective it is absolutely necessary to use a multi-well plate with a glass bottom. The glass thickness should be 0.17mm. We recommend the following plates: | Link in New Window |
|---|
| linkText | Greiner SensoPlate plus 96-well plate #655891 |
|---|
| href | https://shop.gbo.com/en/row/products/bioscience/microplates/sensoplate-glass-bottom-plates/bs-sensoplate-plus/655891.html |
|---|
|
| Link in New Window |
|---|
| linkText | Nunc Optical CVG 96-well 164588 |
|---|
| href | https://www.thermofisher.com/order/catalog/product/164588 |
|---|
|
|
|
| UI Expand |
|---|
| - Collect your samples
- Click Load to close the access door
- Close the INCell Analyzer software
- Transfer your data to disk D: (Data Storage) or your external hard drive and delete it from local disk C:
- Turn off the computer
| Remarque |
|---|
| - Collect your samples, especially those in the microscope
- Leave the microscope and workspace clean
|
|
| UI Expand |
|---|
| - Files can be saved temporarily (during acquisition) to local disk C: (desktop)
- At the end of each session, copy your data to your external drive and delete it from local drive C:
- You can store your files on disk D: (Data Storage). If using this disk, please create one folder per laboratory using the principal investigator's last name. Inside, create a folder per user (First Name_Last Name).
| Remarque |
|---|
| In any case, do not store your files on the C: drive. |
|
| UI Expand |
|---|
| When using for the first time, it is necessary to define the type of plate used.
Create a new plate In the INCell Analyzer software: - Select from the menu Application>Plate\Slide Manager...
- Click on the New Plate\Slide icon
- Select the number of wells in your plate (6, 24, 96 etc...)
- Adjust the following settings:
- Name: Your-Name_Your-Plate
- Plate height, bottom thickness and well volume usually provided in the product technical sheet by the manufacturer
- The material used plastic or glass
- If necessary adjust the number of rows and columns as well as the shape of the well (round or rectangular)
- Click OK
- Close the Plate/Slide Manager window
Measure the bottom height and thickness of the plate bottom In the INCell Analyzer software: - Click on the Dashboard
- In Objective Lens select the 10x objective
- On the plate plan, click on the center of a well containing a sample to center this well on the objective
- In the Dashboard menu select Plate/Slide
- Click Verify LAF
- If the 2 detected peaks (blue vertical lines) correspond to the measured peaks (black curve)
- Click Apply Measured Parameters
- Click OK
- Click Yes
- If the 2 detected peaks (blue vertical lines) do not correspond to the measured peaks (black curve)
- Change the bottom thickness value and repeat the operation
- Close the Laser Autofocus Plate/Slide Verification window
Measure A1 well offset In the INCell Analyzer software: - if necessary, click on the Dashboard > Objective Lens select the 10x objective
- In the channel list, click the + button and add a transmitted light channel (brightfield)
- To the right of the plate layout, click the Setup Preview Imaging button
- Draw a rectangle around well A1
- Click on preview (on the acquisition panel at the top right of the screen)
- Wait for the preview to be generated
- On the plate map, click on the real center of well A1 to center this well on the objective
In the Dashboard menu select Plate/Slide Click Edit Plate then Define Upper Left Well Click Yes - Check that the yellow circle matches the edges of the well
Click Yes
Compute the inter-well distance
|
|
| Tabs Page |
|---|
| id | Light path |
|---|
| title | Light path |
|---|
|
The following diagrams allow you to follow the light path in transmitted light (bright field) and in reflected light (fluorescence). These diagrams will be available soon.
|
| Tabs Page |
|---|
| id | Technical datasheet |
|---|
| title | Technical datasheet |
|---|
|
|
| Tabs Page |
|---|
| id | FAQ |
|---|
| title | Troubleshooting & FAQ |
|---|
| Troubleshooting| UI Expand |
|---|
| title | The microscope does not show the usual green light, what should I do? |
|---|
| Usually, this microscope displays a green light when operational and an orange light when in use. A red light is on means the microscope is not functional. In this case please contact the platform manager. |
FAQ| UI Expand |
|---|
| title | Can I use this microscope to observe cells in culture? |
|---|
| Can I use this microscope to look at cell in a dish? NoYes.This a microscope designed to acquire images of specimen is designed for high-throughput acquisition of specimens in multi-well platesYou may also image . The microscope can control temperature but does not have an environmental chamber.You can also acquire images of specimen mounted between a slide and a 0.17mm thick coverslipcoverslip (thickness 0.17mm). |
| UI Expand |
|---|
| title | How to turn off the microscope? |
|---|
| Usually the microscope remains on. However, it is best to turn it off if not in use for a long time (weeks). To do this: - Navigate to the menu Application > Hardware >
- Click Shutdown Instrument
- Wait for the microscope to turn off
- The software closes automatically
|
|
|