Vous regardez une version antérieure (v. /display/brano/Lakeshore+DESERT1) de cette page.
afficher les différences
afficher l'historique de la page
« Afficher la version précédente
Vous regardez la version actuelle de cette page. (v. 14)
afficher la version suivante »
Unknown macro: {bgcolor} Local 1176
Responsables:
Pierre Levesque (p.levesque@umontreal.ca).
Khalid Laaziri (khalid.laaziri@umontreal.ca).

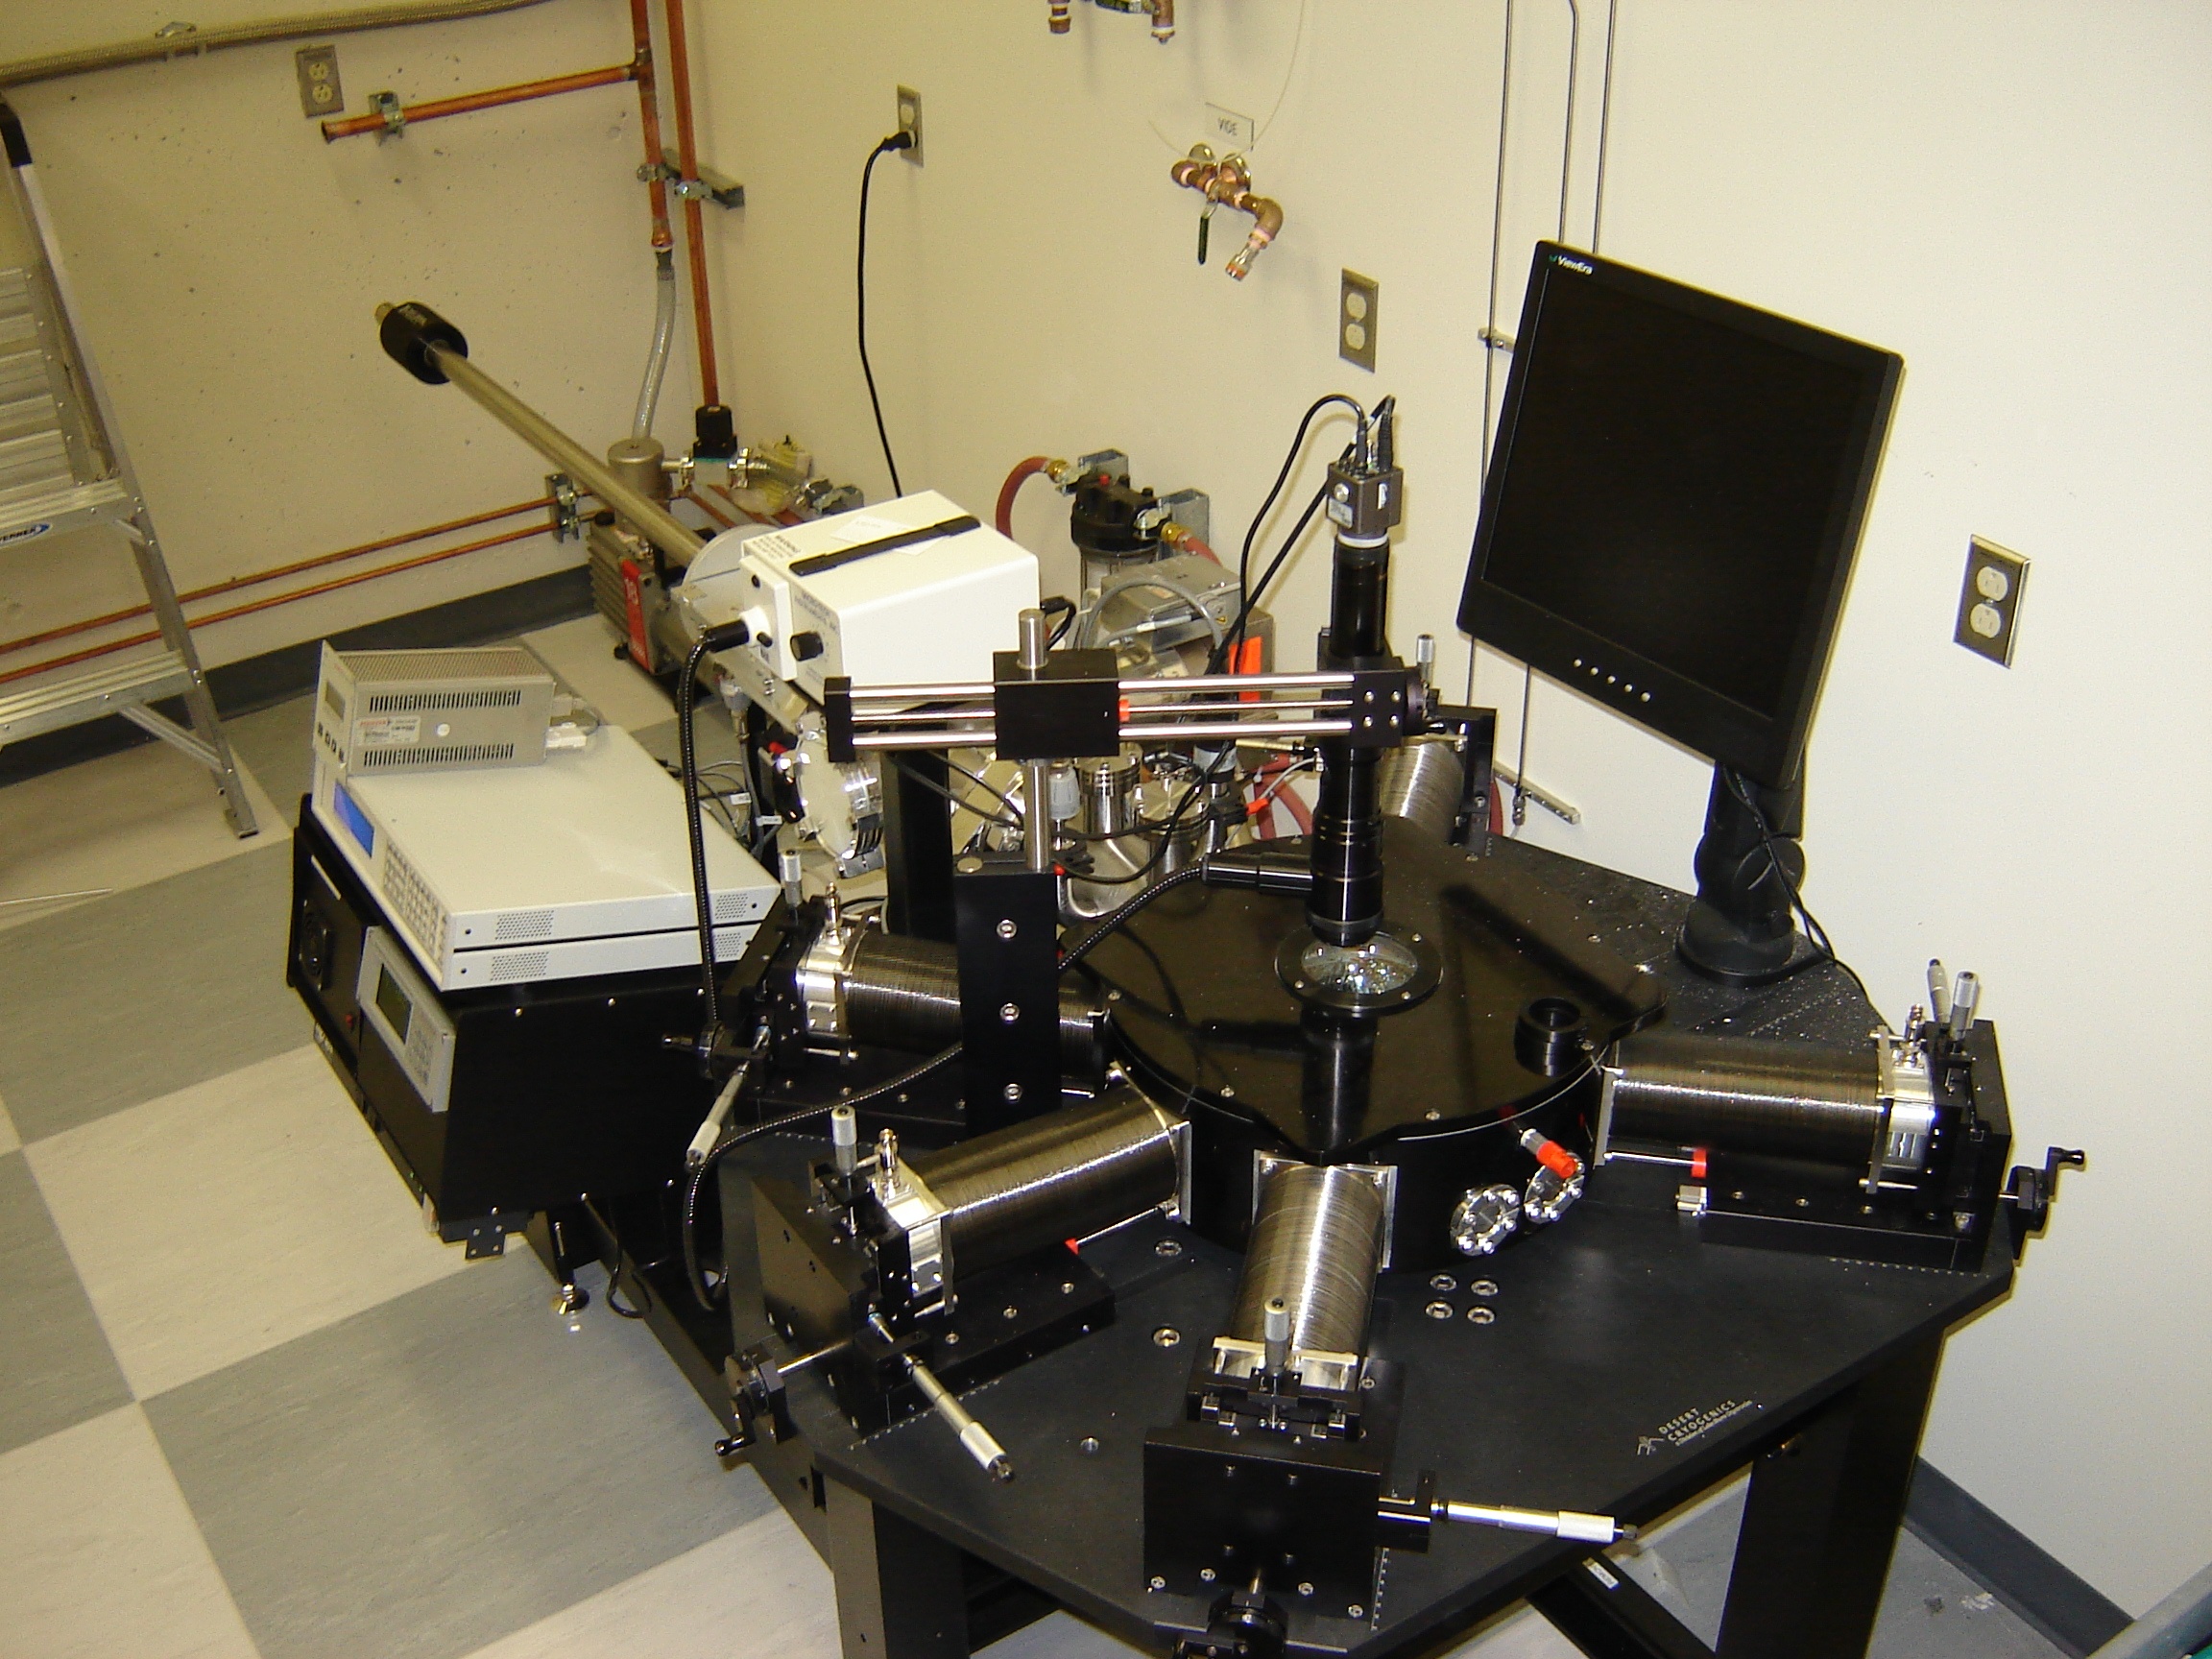
Unknown macro: {align} La station sous pointes LAKESHORE DESERT CRYOGENICS FWP6 est un système munie de 5 bras manipulateurs pouvant portés des pointes DC/RF. La station permet de caractériser électriquement des dispositifs électroniques sur des gauffres ( jusqu'à 4 pouces de diamètre). La station, étant cryogènique, peut-être refroidit jusqu'à 4.2 K. Le système est aussi équipée d'une caméra couplée à un zoom optique qui posséde une résolution de 3 microns.
- Temperature controller: Lakeshore 332
- Temperature range: 4.2 K to 475 K
- Probes: ZN50-25-Be-Cu (50 Ohm)
- Probe cable: type Cu-SS-36/50 Ultra miniature cryogenic coaxial cable with SMA connector at probe end to 3-lug triax feedthrough.
- Radiation shield heater: 100 W total
- Cold head heater: 100 W total
 |
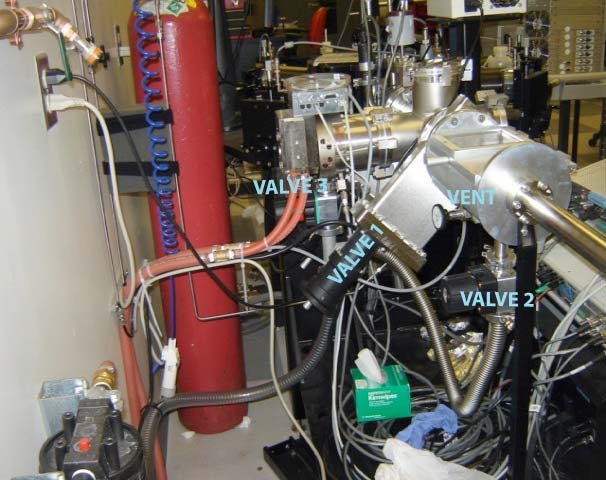
- Fermer la VALVE 1 entre la turbo et le SAS.
- Fermer la VALVE 2 entre la pompe primaire et le SAS.
- Ouvrir la valve de purge (VENT), attendre jusqu'à la pression atmosphérique.
- Ouvrir le SAS, placer les échantillons.
- Fermer la VALVE 3 entre la pompe primaire et la pompe TURBO.
- Ouvrir la VALVE 2 pour pomper le SAS avec la pompe primaire.
- Lorsque le vide atteint 10 -3 TORR, fermer la VALVE 2.
- Ouvrir la VALVE 3 entre la pompe primaire et la TURBO.
- Ouvrir lentememnt la VALVE 1 entre le SAS et la TURBO.
- Bouger le bras de transfert jusqu'à la chambre.
- Bloquer le porte échantillon, ensuite dévisser le bras de transfert et le ramener vers le bas.
- Fermer la VALVE 1.
|


|
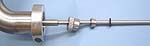
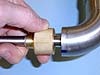
Prepare the transfer line by placing
the compression fitting onto the transfer
line shoulder. The compression fitting came
installed on the probe station's bayonet and
was removed during assembly.
|

|
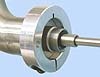
Close the foot valve, and then open by turning five to six complete turns
counter-clockwise.
|

|
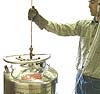
Slowly insert the transfer line into a Dewar. The required port is a
0.5-inch o-ring compression seal. Lower the leg slowly until the Dewar
pressure just starts to rise. Close the low-pressure (typically 0.5 psi) relief
valve on the Dewar. Monitor the pressure and be sure to keep it below 6 psi.
This can be achieved using a relief valve on the Dewar exhaust or by
connecting a regulated helium supply to the Dewar exhaust.
|
|
Continue to lower the transfer line slowly enough that the Dewar pressure
does not rise dramatically, until the transfer line leg hits the bottom of the
Dewar. The Dewar pressure should be approximately 5 psig. The process of
precooling the transfer line is complete when a continuous plume of white
vapor is ejected from the other end of the transfer line. The time required
should have been approximately 5 minutes. Note the size of the white plume
to mentally compare it with earlier, successful precools.
|

|
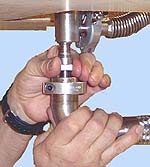
Insert the transfer line into the bayonet on the probe station. You may need to wipe ice crystals from
the tip of the transfer line before insertion; use a clean cloth for this purpose. Push the transfer line
in until it stops, then tighten the outer nut on the compression fitting at the base of the transfer line
leg. The transfer is started.
To secure the transfer line in position, insert the clevis pin in the holes in the lower and upper rings.
Insert the cotter pin to hold the clevis pin in place.
The process is the same for nitrogen, except the transfer line will cause less pressure rise in the
Dewar, and an external source of pressure may be needed.
|
|
Set the desired temperature on the temperature controller. To continue transfer into the probe
station, settings for fast initial cooldown are foot valve fully open (5 to 6 turns open) and Dewar
pressure at about 5 psig. Once the probe station is cool, the transfer rate can be reduced. For
temperatures below 60 K, it works well to keep the Dewar pressure at 2 to 3 psig and close the foot
valve until the desired transfer rate is achieved. The general procedure is to close the foot valve until
the cold head temperature starts to rise, and then continue closing the foot valve until the set-point
temperature can be maintained with control heat applied to the cold head. For temperatures above
60 K, the required flow is very small. More efficient long-term transfer is achieved by lowering the
Dewar pressure to about 0.5 psig and adjusting the foot valve setting accordingly.
|
Pour l'Azote, il faut on ouvrir la vanne de 10 tours et ajuster la pression à 8 psi
- Setpoint : choisir la T initiale
- Ramp : utiliser « next setting » pour mettre la rampe ON et ensuite « save screen » pour sauver.
- Setpoint : choisir la T finale
- Control setup pour vérifier les paramètres
- Heat : avec heat range, on choisit la puissance. Augmenter la puissance pour atteindre la température voulue, mais pas trop pour ne pas la dépasser (rétroaction par PID)
Attention Il ne faut pas dépasser 400K sur le porte-échantillon et 320K sur le radiation shield.
Laboratoires