| Tabs Page |
|---|
| id | Description |
|---|
| title | Description |
|---|
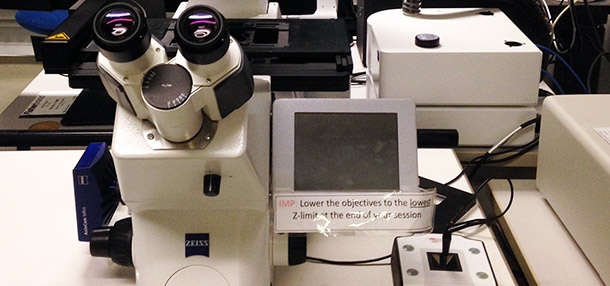
| Zeiss Axio-Observer Z1 fully motorized inverted microscopeRoger Gaudry Building, Room R-421
Simple Microscope usage price Instrument awarded to Dr. Audrey Claing and Jean-Philippe Gratton by the Canadian Foundation for Innovation (CFI) - Applications
- Bright-field
- Phase contrast
- Fluorescence
Light sources
Objectives 2.5x/0.085 Air WD 8.8 - Empty
10x/0.25 Air Ph1 WD 6.5 - Empty
- 20x/0.5 Air Ph2 WD 2.0
- 40x/0.95 Air WD 0.25
| Développer |
|---|
| title | Objectives complete specifications |
|---|
|
| Position | Name | Brand | Full name | ID | Magnification | Numerical Aperture | Immersion | Type | Working distance (mm) | Transmittance
(% [nm]) | Technique | Cover glass thickness (mm) |
|---|
| 1 | 20x/0.5 Air | Zeiss | 20x/0.50 Ph2
EC Plan-Neofluar
M27 | 420351-9910 | 20x | 2.0 | Air | Plan Neofluar | 2.0 | Not Available | BF, PhC, Fluo | 0.17 | | 2 | Empty |
|
|
|
|
|
|
|
|
|
|
| | 3 | | Zeiss | 40x/0.95
Plan-Apochromat Corr
M27 | 420660-9970 | 40x | 0.95 | | Plan ApoChromat | 0.25 | >80% [400-840] | BF, Fluo | 0.13 - 0.21
Correction ring | | 4 | Empty |
|
|
|
|
|
|
|
|
|
|
| | 5 | 2.5x/0.085 Air | Zeiss | 2.5x/0.085
EC Plan-Neofluar
M27 | 420320-9902 | 2.5x | 0.085 | Air | Plan Neofluar | 8.8 | >95% [400-750] | BF, Fluo | 0.17 | | 6 | 10x/0.25 Air | Zeiss | 10x/0.25 Ph1
N-Achroplan
M27 | 420941-9911 | 10x | 0.25 | Air | AchroPlan | 6.5 | Not available | BF, PhC, Fluo | 0.17 |
|
- Filter cubes
- DAPI
- GFP
- Rhodamine
- DHE (dihydroethidium)
- Cy5
- Quadruple DAPI/GFP/Cy3/Cy5
| Développer |
|---|
| title | Filters complete specifications |
|---|
|
| Position | Name | Brand | ID | Excitation filter | Dichroic mirror | Emission filter | Comments |
|---|
| 1 | DAPI
Filter Set 49 | Zeiss | 488049-9901 | 365/50
[325-375] | 395LP | 445/50
[420-470] |
| | 2 | GFP
Filter Set 13 | Zeiss | 488013-0000 | 470/20
[460-480] | 495LP | 517/25
[505-530] |
| | 3 | Rhodamine
Filter Set 43 | Zeiss | 000000-1114-101 | 545/25
[533-567] | 570LP | 605/70
[570-640] |
| | 4 | DHE | Custom | Custom | 500/50
[475-525] | 540LP | 580/20
[570-590] | Undefined specifications
Best guess values | | 5 | Cy5
Filter Set 50 | Zeiss | 488050-9901 | 640/30
[625-655] | 660LP | 690/50
[665-715] |
| | 6 | Quadruple
DAPI/GFP/Cy3/Cy5
FS90 HE LED |
| 489090-9110-000
|
| QBS 405 + 493 + 575 + 653 | QBP 425/30+514/30+592/25+709/100 | Excitation filters included in the light source FS90 HE LED |
|
- Detector
- Zeiss AxioCam MR R3 CCD Camera 1388 x 1040 pixels, 12-bit, 13 images/s at full resolution, detector size 8.9 mm x 6.7 mm
|
| Tabs Page |
|---|
| id | User Guide |
|---|
| title | User Guide |
|---|
| | UI Expand |
|---|
| Remove the dust cover from the microscope Turn on the computer (#1) - If necessary, turn on the power bar for the incubation module (#2A) and open the CO2 cylinder (#2B)
Turn on the power bar at the left of the computer monitor (#3) Press the microscope start button located on the rear left of the microscope (#4) - Log in Windows using your UdM credentials
| Remarque |
|---|
When using for the first time, it is necessary to import the microscope-specific parameters BEFORE starting the software. See the First Use section below. |
- Start the Zen software
|
| UI Expand |
|---|
| When using for the first time, it is necessary to import the microscope-specific parameters into the software. This procedure is usually carried out during the training session.However, it is also possible to use it to reset the software if it is not displayed correctly, for example. | Remarque |
|---|
Please note, this procedure will delete all your experiment protocols and restore the software to its original settings. |
- If open, close the Zen software and wait for it to close completely (up to 30 seconds)
- On the Desktop open the Documentation folder
- Double-click Settings for Axio-Osberver Z1
- A script will run and a black window will appear briefly
- You can then reopen the Zen software
|
| UI Expand |
|---|
| This procedure puts the microscope in a safe configuration and performs a focus calibration. At the end of this procedure the microscope will be ready for acquisition. | UI Expand |
|---|
| On the microscope touch screen: - Press Home>Load Position to lower the stage to its lowest position
- Press Set Work Position to store this position
- If necessary, move the focus slightly up to remove the “Lower Z limit reached” message displayed on the touchscreen
- Press Home>Microscope>Turret>Objectives>10x to select the 10x objective
- If asked, tap Done to remove the oil lens cleaning warning
- Press Home>Microscope>XYZ>Position>Z-Position>Set zero>Auto to perform focus calibration
- Press OK to start the focus calibration procedure
- Wait a few seconds for the calibration to be completed
| Remarque |
|---|
Once calibrated, the focus can be found at Z = 1.5 mm). The Z value can be found on the microscope touch screen Home>Z-Position |
|
| UI Expand |
|---|
| | Avertissement |
|---|
| Make sure to calibrate the focus before performing the first focus. |
On the microscope touch screen: - Press Home>Microscope>Turret>Objectives
- Press 10x to select the 10x lens
| Info |
|---|
The 10x objective is the safest because it has the longest working distance (6.5 mm). The sample will appear perfectly sharp long before the lens approaches it. It is recommended to always first focus with the safest lens. The objectives are para-focal, focusing with the safest objective will then allow you to easily find your sample with another objective. |
- Press Home>Load Position to lower the stage to its lowest position
- Press Set Work Position to store this position
- If necessary, move the focus slightly up to remove the “Lower Z limit reached” message displayed on the touchscreen
- Place the test slide on the microscope stage with the coverslip toward the objective
| Remarque |
|---|
| Always use the test slide to perform the first focus. |
- If necessary, move the stage so that the sample is centered on the objective
On the computer: - Open the Zen software
- In the Locate tab, select BF or the desired fluorescence (GFP, DsRed, DAPI, etc…) to activate the configuration
- Adjust the focus with the main dial while looking through the eyepieces until the image is perfectly sharp
| Remarque |
|---|
Once calibrated, the focus can be found at Z = 1.5mm). The Z value can be found on the microscope touch screen Home>Z-Position |
- In the Locate tab, select Off to turn off the illumination
|
| UI Expand |
|---|
| | Avertissement |
|---|
| First focus with the safest lens before selecting another lens and continuing with secondary focus. |
| UI Expand |
|---|
| title | Focusing with air objectives |
|---|
| After performing the first focus, on the microscope touch screen: - Press Home>Microscope>Turret>Objectives
- Press 20x or 40x to select the desired lens
| Info |
|---|
The 40x objective is the best Air objective because it has the greatest number of optical corrections (Plan Apochromat) and the largest numerical aperture (0.95). It offers a lateral resolution of 420nm at a wavelength of 550nm. |
- Adjust the focus with the precision dial while looking through the eyepieces until the image is perfectly sharp
- Your sample is ready for acquisition!
|
| UI Expand |
|---|
| title | Focusing with oil lenses |
|---|
| This microscope does not have oil immersion objectives. However, if there were, the procedure would be as follows: After performing the first focus, on the microscope touch screen:
- Press Home>Microscope>Turret>Objectives
Press 63x Oil, 100x Oil (1.3) ou 100x Oil (1.4) to select the desired lens. The microscope will automatically lower the stage so that the sample is accessible.
| Info |
|---|
The 63x objective is the best oil objective because it has the most optical corrections (Plan Apochromat) and the largest numerical aperture (1.4). It offers a lateral resolution of 240nm at a wavelength of 550nm. |
- Place a drop of oil on your sample
- Press Done. The microscope will automatically return the sample to its original position
In Zen Blue software: - In the Locate tab, select BF or the desired fluorescence (GFP, DsRed, DAPI, etc…) to activate the configuration
- Adjust the focus with the precision dial while looking through the eyepieces until the image is perfectly sharp
- In the Locate tab, select Off to turn the illumination off
- Your sample is ready for acquisition!
|
|
|
| UI Expand |
|---|
| - Files can be saved temporarily (during acquisition) on the local C: drive (desktop)
- At the end of each session, copy your data to your external drive and delete it from the local C: drive
- You can store your files on the D: drive (Data Storage). If you do, please create a folder per laboratory using the principal investigator last name. Within, create one folder per user (Firstname_Lastname).
| Remarque |
|---|
In any case, your files should be removed from the C: drive. |
|
| UI Expand |
|---|
| - Save your data
- Close the Zen software
- Transfer your data to the D: drive (Data Storage) or to your external drive and delete it from the local C: drive
If used, turn off the incubation module power strip (#2A) and close the CO2 cylinder (#2B) Select the 10x objective and press load position to bring the objectives to the bottom position
Turn off the microscope power bar (#3) - Turn off the computer
- Cover the instrument with the protective dust cover
| Remarque |
|---|
| - Take back your samples including ones in the microscope
- Leave the microscope and the working area clean
|
|
|
| Tabs Page |
|---|
| id | Lightpath |
|---|
| title | Lightpath |
|---|
| The following schematics depict the light path for transmitted (bright-field and Phase Contrast) and reflected (fluorescence) lights. | PDF |
|---|
| name | LightPath_Zeiss_Z1.pdf |
|---|
|
|
| Tabs Page |
|---|
| Available manuals |
| Tabs Page |
|---|
| | UI Expand |
|---|
| - Check stage tilt
- Ask for Colibri Remote
- Ask for fluorescence backlight from LED
|
| UI Expand |
|---|
| title | 2024-02-22 Microscope Firmware update |
|---|
| - Microscope Firmware update to add Colibri to the touchscreen
- Zen 3.5 HotFix 10
|
| UI Expand |
|---|
| - Computer replacement
- Added Colibri
- Added startup procedure
- Parafocality and paracentrality
|
| UI Expand |
|---|
| - Added complete description
|
|
| Tabs Page |
|---|
| id | Technical Datasheet |
|---|
| title | Technical Datasheet |
|---|
| StandLight sources- Transmitted LED light
- Colibri 7 R(G/Y)B-UV 423052-9730-000 Serial 5440000661
CondenserObjectives2.5x/0.085 Air WD 8.8 - Empty
10x/0.25 Air Ph1 WD 6.5 - Empty
- 20x/0.5 Air Ph2 WD 2.0
- 40x/0.95 Air WD 0.25
Stage- Motorized stage Marzhauser Sensotech, Part number 432903-9011-000, #14 07 132052; 90-76-200-0820
- Remote control joystick
- Inserts
- Slide combo
- 6-well plate
- 35 mm dish
- Multi-well plat
Filters- DAPI Filter Set 49
- GFP Filter Set 13
- Rhodamine Filter Set 43
- DHE (dihydroethidium) 424931
- Cy5 Filter Set 50
- Multiband FS90 HE LED
Detector- Zeiss AxioCam MR R3 CCD Camera 1388 x 1040 pixels, 12-bit, 13 images/s at full resolution, detector size 8.9 mm x 6.7 mm. Model: r3.1 Part Number: 426509-9901-000. Serial: 1 22 12 5537
Workstation- Fujitsu Esprimo P920 E90+
- Intel Core i5-4670 @ 3.4 GHz
- RAM 32 GB DDR3 1600 MHz ECC (4 x 8 GB)
- OS 500 GB SSD 550 MB/s
- 2 TB HD Data Storage (2 x 1 TB spanned volume) 110 MB/s
- Video Card AMD FirePro V4900 1 GB DDR5 dedicated memory
- Monitor LG Flatron E2711 27' 1920 x 1080
- Software Zen Blue 3.5 HASP YRMDZ 1798977001 1798977001
Incubation- Pecon stage top incubation
Consumables- CO2 Tank
- N2 Tank
- Oil
- Lens Cleaner
|
| Tabs Page |
|---|
| id | FAQ |
|---|
| title | Troubleshooting & FAQ |
|---|
| Troubleshooting| UI Expand |
|---|
| title | Troubleshooting | I see a high background in fluorescence |
|---|
| The fluoresncece light source is a Colibri while the transmitted light is a LED. What happens is that the fluorescence illumination reflects and into the LED and give a high background. To solve this: - Tilt the transmitted light arm backward
or - Stop the light from entering the transmitted LED by using a cardboard
|
FAQ| UI Expand |
|---|
| title | FAQ | Can I use this microscope to look at cell in a dish? |
|---|
| - Yes. This is an inverted microscope designed to look at specimen in a dish or a multi-well plate
- The objectives are optimized to image through thin glass bottom multi-well plates
- You may also image specimen mounted between a slide and a 0.17mm thick coverslip
- For long timelapse, be aware of photo-toxicity
|
| UI Expand |
|---|
| title | Can I use this microscope to perform timelapse experiments? |
|---|
| Yes, but... This microscope has an incubation module to maintain temperature, humidity and gas. Yet it does not have a Definite focus which can maintain focus throughout time. Therefore, it is possible to loose the focus over long period. |
|
|