| Tabs Page |
|---|
| id | Description |
|---|
| title | Description |
|---|
|
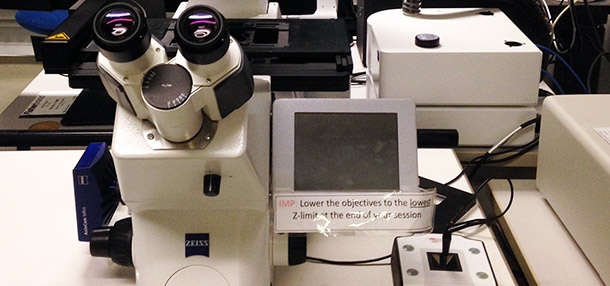
Zeiss Axio-Observer Z1 inverted microscope
Roger Gaudry Building, Room R-421
Access upon request to the platform manager. Consult the | Link in New Window |
|---|
| icon | false |
|---|
| linkText | fees structure |
|---|
| href | https://pharmacologie-physiologie.umontreal.ca/wp-content/uploads/sites/38/2017/05/tarification-2017.pdf |
|---|
| target | _blank |
|---|
|
and| Link in New Window |
|---|
| icon | false |
|---|
| linkText | access policies |
|---|
| href | https://pharmacologie-physiologie.umontreal.ca/ressources/plateforme-de-microscopie/politique-dacces/ |
|---|
| target | _blank |
|---|
|
of the| Link in New Window |
|---|
| icon | false |
|---|
| linkText | Phamarcology and Physiology Department Microscopy Platform |
|---|
| href | https://pharmacologie-physiologie.umontreal.ca/ressources/plateforme-de-microscopie/ |
|---|
| target | _blank |
|---|
|
.Serial Camera 1 22 12 5537 r3.1 426509-9901-000 Identifiant système 1024979772.- Applications
- Bright-field
- Phase contrast
- Fluorescence
Light sources
Objectives 2.5x/0.085 Air WD 8.8 - Empty
10x/0.25 Air Ph1 WD 6.5 - Empty
- 20x/0.5 Air Ph2 WD 2.0
- 40x/0.95 Air WD 0.25
| Développer |
|---|
| title | Objectives complete specifications |
|---|
|
| Position | Name | Brand | Full name | ID | Magnification | Numerical Aperture | Immersion | Type | Working distance (mm) | Transmittance
(% [nm]) | Technique | Cover glass thickness (mm) |
|---|
| 1 | 20x/0.5 Air | Zeiss | 20x/0.50 Ph2
EC Plan-Neofluar
M27 | 420351-9910 | 20x | 2.0 | Air | Plan Neofluar | 2.0 | Not Available | BF, PhC, Fluo | 0.17 | | 2 | Empty |
|
|
|
|
|
|
|
|
|
|
| | 3 | | Zeiss | 40x/0.95
Plan-Apochromat Corr
M27 | 420660-9970 | 40x | 0.95 | | Plan ApoChromat | 0.25 | >80% [400-840] | BF, Fluo | 0.13 - 0.21
Correction ring | | 4 | Empty |
|
|
|
|
|
|
|
|
|
|
| | 5 | 2.5x/0.085 Air | Zeiss | 2.5x/0.085
EC Plan-Neofluar
M27 | 420320-9902 | 2.5x | 0.085 | Air | Plan Neofluar | 8.8 | >95% [400-750] | BF, Fluo | 0.17 | | 6 | 10x/0.25 Air | Zeiss | 10x/0.25 Ph1
N-Achroplan
M27 | 420941-9911 | 10x | 0.25 | Air | AchroPlan | 6.5 | Not available | BF, PhC, Fluo | 0.17 |
|
- Filter cubes
- DAPI
- GFP
- Rhodamine
- DHE (dihydroethidium)
- Cy5
| Développer |
|---|
| title | Filters complete specifications |
|---|
|
|
- Détector
- Zeiss AxioCam MR R3 CCD Camera 1388 x 1040 pixels, 12-bit, 13 images/s at full resolution, detector size 8.9 mm x 6.7 mm
|
| Tabs Page |
|---|
| id | User Guide |
|---|
| title | User Guide |
|---|
|
| UI Expand |
|---|
| expanded | true |
|---|
| title | Start-up |
|---|
| - Turn on the computer (#1)
- Turn on the microscope power bar (#2)
If incubation is required, turn on the Okolab incubation module (#3A) and the Lauda water-bath (#3B) and open the CO2 (#3C) and N2 (#3D) tanks | Avertissement |
|---|
Make sure the humidifier and the water bath are clean and properly filled with distilled water. |
- Log in Windows using your UdM credentials
- Start-up NIS-Elements
| Info |
|---|
The first time you use the instrument, you need to import the microscope settings into the software. To do this follow the instructions Software setup. |
|
| UI Expand |
|---|
| - Save your data
- Close NIS-Elements
- Transfer your data to the D: drive (Data Storage) or to your external drive and delete it from the local C: drive
- Turn off the computer
- If oil objectives were used, clean it with lens cleaner and lens paper (not Kimwipes)
- If incubation was used, turn off the Okolab incubation module (#3A) and Lauda water-bath (#3B) and close the CO2 (#3C) and N2 (#3D) tanks
- Turn off the microscope power bar (#2)
- Cover the microscope
| Remarque |
|---|
| - Take back your samples including ones in the microscope
- Leave the microscope and the working area clean
|
|
| UI Expand |
|---|
| - Files can be saved temporarily (during acquisition) on the local C: drive (desktop)
- At the end of each session, copy your data to your external drive and delete it from the local C: drive
- You can store your files on the D: drive (Data Storage). If you do, please create a folder per laboratory using the principal investigator last name. Within, create one folder per user (Firstname_Lastname).
| Remarque |
|---|
In any case, your files should be removed from the C: drive. |
|
| UI Expand |
|---|
| The first time you use the instrument, you need to import the microscope settings into the software. You will usually do this during the training session.
This procedure can also be performed if something is not working properly and if you want to reset the software to its original settings. | Remarque |
|---|
This process will delete all experiment protocols and reset the software to the original settings for this specific microscope. |
- If open, close NIS-Elements and wait until it is completely closed (up to 30 seconds)
- On your Desktop open the Softwares folder
- Open NIS Settings Utility
- Click on the Import tab
- Click on Browse
- Navigate to your Desktop
- Select the file Nikon-Ti2 Settings.bin
- Click Select
- Select all items
- Click Import
- Click OK
- Close the NIS Settings
- You can now reopen NIS-Elements
|
|
| Tabs Page |
|---|
|
Available manuals
|
| Tabs Page |
|---|
|
| UI Expand |
|---|
| - Added complete description
|
|
| Tabs Page |
|---|
| id | Technical Datasheet |
|---|
| title | Technical Datasheet |
|---|
| StandLight sources- Transmitted LED light
- ND32 filter
- IR filter
- Manual Polarizer
- TBD Filters
- X-Cite 120Q Serial: TBDLumencor SpectraX 6-NII-SE Serial 9409
CondenserObjectives- 20x/0.5 Air Ph1 WD 2.1
- 60x/1.4 Oil DIC WD 0.13
- 100x/1.45 Oil Ph3 WD 0.13
- 100x/1.45 Oil DIC WD 0.13
- 4x/0.2 Air WD 20
- 20x/0.75 Air DIC WD 1.0
Stage- Motorized stage Ti2 SHU compatible Serial 127808
- Remote control joystick Ti2-S-JS Serial 127976
- Inserts
- Multi-well plate Ti2-S-HW with tilt adjustment (no incubation)
- Combo slide 3cm dish Ti2-S-HU with tilt adjustment (no incubation)
- Okolab H101-CellASIC Frame with perfusion ports
- 1 x 35mm petri dish 1x35-M + cover
- 2 Chamber Slide 2xGS-M+ cover
- 1 Multi-well for oil objectives MW-OIL
- 6-well plate 6MW+ cover
- 1 CellASIC + cover
Filters - DAPI Cube Ex 383-408 DAPI-U DM 425 BA 435-485
- GFP Cube Semrock 96372 M349727 17
- Cy5 Cube Semrock 96376 M351081 8
- 77074160 Custom Quad C182279 Polychroic and quad bandpass emitter for use with the following single bandpass filters: ET395/25x, ET470/24x, ET550/15x, ET640/30x
- DIC Analyser Ti2-C-DICACL
- C197767 7707\4656 CFP\YFP\mCherry XT
Detector- Hamamatsu ORCA Flash V2 C11440-22CU CMOS Monochrome Camera 2048 x 2048 pixels, 16-bit, 30fps at full frame Serial 101081
WorkstationObjectives2.5x/0.085 Air WD 8.8 - Empty
10x/0.25 Air Ph1 WD 6.5 - Empty
- 20x/0.5 Air Ph2 WD 2.0
- 40x/0.95 Air WD 0.25
Stage- Motorized stage Marzhauser Sensotech, Part number 432903-9011-000, #14 07 132052; 90-76-200-0820
- Remote control joystick
- Inserts
- Slide combo
- 6-well plate
- 35 mm dish
- Multi-well plat
Filters- DAPI Filter Set 49
- GFP Filter Set 13
- Rhodamine Filter Set 43
- DHE (dihydroethidium)
- Cy5 Filter Set 50
- Empty
Detector- Zeiss AxioCam MR R3 CCD Camera 1388 x 1040 pixels, 12-bit, 13 images/s at full resolution, detector size 8.9 mm x 6.7 mm. Model: r3.1 Part Number: 426509-9901-000. Serial: 1 22 12 5537
Workstation- Fujitsu Esprimo P920 E90+
- Intel Core i5-4670 @ 3.4 GHz
- RAM 32 GB DDR3 1600
- HP Z440 Workstation
- Intel Xeon E5-1620 v4 @ 3.5GHz
- RAM 32 GB DDR4 2400 MHz ECC (4 x 8 GB)
- OS 500 GB SSD 550 MB/s
- 4 2 TB HD Data Storage (2 x 2 1 TB spanned volume) 170 110 MB/s
- Video Card nVidia GTX 1080 8GB Card AMD FirePro V4900 1 GB DDR5 dedicated memory
- Monitor HP Z24i Monitor TBD display 24TBD' 1920x12001920 x 1200
- Software NIS-Elements AR v5.02Zen Blue 2.0
Incubation- Okolab BoldLine Temperature unit Serial 284-1058 H101 T Unit BL
- Okolab BoldLine CO2/O2 Unit 0-10/1-18 Serial 088-1102
- Okolab OkoTouch Serial 118-224
- Lauda water-bath Model Eco RE415 S LCK 4910 Serial LCK-4910-16-0006 Okolab 1322-1006 2017-05-30
Consumables- CO2 Tank
- N2 Tank
- Liquid Light Guide
- 100 W Mercury lamp
|
| Tabs Page |
|---|
| id | FAQ |
|---|
| title | Troubleshooting & FAQ |
|---|
|
Troubleshooting
| UI Expand |
|---|
| title | Chamber does not reach the desired temperature (or is very slow to warm up) |
|---|
| This can happen when the liquid running through the chamber is not flowing properly. - Pause your experiment
- Turn off the Okolab environment controller 3A and 3B
- Disconnect the blue end of the connection pipe (at the junction with the spring shape objective warmer)
- Place the open end into a dish to collect liquid
- Turn the Lauda water bath back ON (3B)
- The liquid should flow quite rapidly, if not proceed as follow
- Turn OFF the Lauda water bath (3B)
- Take the 20 mL syringe located inside the drawer labelled Tubing
- Connect it to the open end of the blue pipe
- Use the syringe to blow pressurized air into the pipes to clear it out
- Remove the syringe (and store it back into the Tubing drawer)
- Test if the liquid is now flowing properly by turning the Lauda water bath back ON (3B)
- If not repeat the procedure
- If so, turn OFF the Lauda water-bath (3B)
- Reconnect the blue and green pipes together
- Turn the Okolab environment controller 3A and 3B back ON
| Avertissement |
|---|
Be careful not to touch your sample when performing these actions as it may displace your current acqusition |
| Info |
|---|
| title | How the Okolab chamber works |
|---|
| The liquid from the water bath enters the lead first via the red pipe - Then it goes through the lead circuitry to keep it warm
- It exists via the unlabeled tube and enters the incubation chamber main body
- It goes through the circuitry of the main body and exits via the green labelled tube
One must maintain a decent amount of liquid in the Lauda water bath to avoid bubble formation in the circuitry Because the circuitry inside the top lead and the incubation chamber main body is thin it can get clogged. The procedure above can solve this issue. | UI Expand |
|---|
| title | Liquid forming inside the incubation chamber |
|---|
| This happens when the mixed-gas humidifier is overfilled. Bubbles created by the gas going through the humidifier can bring liquid into the gas feed line. - Turn off the Okolab module and the water bath
- Remove your sample and store it properly
- Dry the incubation chamber with a clean tissue
- Carefully remove the cap of the humidifier glass bottle
| Avertissement |
|---|
Pay extra care when manipulating the humidifier bottle as it is made of glass and is very fragile |
- Remove distilled water from the humidifier
| Info |
|---|
Humidifier shouldn't be more than 2/3rd filled |
- Close the humidifier by replacing the cap
- Turn on the Okolab module and the water bath
| UI Expand |
|---|
| title | Liquid forming inside the incubation chamber but the humidifier is not overfilled |
|---|
| This can happen during long experiments. The high humidity of the gas mixture condensates in the pipe between the humidifier and the incubation chamber. - Pause your experiment
- Disconnect both ends of the yellow tube from the humidifier
- Drain the tube from any liquid
- Reconnect the yellow tube to the humidifier
- You can use a syringe or gas pressure to blow out any liquid from the incubation chamber cover
| Avertissement |
|---|
Be careful not to touch your sample when performing this action |
- Wipe any liquid with a tissue
- Reconnect the yellow tube to the incubation chamber
|
| I don't see any fluorescence! |
| This microscope is motorized for most of its components, yet the X-Cite light source is manual. Ensure the X-Cite diaphragm (#4B) fully opened (high position). - On the X-Cite lamp
- Turn the intensity diaphragm (#4B) up
|
FAQ| UI Expand |
|---|
| title | Can I use this microscope to look at cell in a dish? |
|---|
| - Yes. This is an inverted microscope designed to look at specimen in a dish or a multi-well plate
- The objectives are optimized to image through thin glass bottom multi-well plates
- You may also image specimen mounted between a slide and a 0.17mm thick coverslip
- For long timelapse, be aware of photo-toxicity
|
| UI Expand |
|---|
| title | How can I warm up the incubation chamber faster? | Can I use this microscope to perform timelapse experiments? |
|---|
| Yes, but... This microscope has an incubation module to maintain temperature, humidity and gas. Yet it does not have a Definite focus which can maintain focus throughout time. Therefore, it is possible to loose the focus over long period. You may use a trick to warmup the incubation chamber faster. Using this method. you should reach a stable temperature within 30 minutes. | Avertissement |
|---|
Do NOT proceed with your sample but with a blank control (dish with distilled water for example) |
- Place your blank control in the incubation chamber
- Immerge the tip of the sample temperature probe in the blank
- Set the Okolab temperature Control Mode to Chamber (Settings>Temperature>Control Mode>Chamber>Save)
- Set the Okolab temperature to 50°C (Home>Temperature>50°C>Set)
- Check the temperature of the sample (Menu Magnifier>Sample Temperature). It should take between 10 to 15 minutes for the blank to reach 30°C.
| Info |
|---|
The Lauda water bath is faster to warm up water than to cool it down. Make sure to anticipate and not pass beyond the desired temperature.
If your desired temperature is 37°C, you can stop the procedure when the blank has reached 30°C. |
When the blank has reach the desired temperature Set the Okolab temperature back to 37°C (Home>Temperature>37°C>Set)Set the Okolab temperature Control Mode to Sample (Settings>Temperature>Control Mode>Sample>Save)Wait 10 to 20 minutes until the temperature stabilizesThen you can safely replace the blank with your sample |
|
|