Olympus BX63 upright microscope
P-G Desmarais Building, Room 5308-2
Advanced Microscope Tier 1 usage price
Instrument awarded to Dr Marina Martinez by the Canadian Foundation for Innovation (CFI)
Applications
- Transmitted light, Bright-field
- Polarized light, DIC
Fluorescence
- Color camera
Light sources
LED lamp for transmitted light
X-Cite NOVEM-S XT910 for fluorescence
Objectives
4x/0.16 Air WD 16
10x/0.4 Air WD 3.1
20x/0.75 Air WD 0.6
40x/0.95 Air WD 0.18
60x/1.35 Oil WD 0.15
100x/1.4 Oil WD 0.13
Empty
| Position | Nom | Marque | Nom complet | Identifiant | Ouverture numérique | Immersion | Distance de travail (mm) | Transmittance (% [nm]) | Technique | Épaisseur du couvre-objet (mm) |
|---|---|---|---|---|---|---|---|---|---|---|
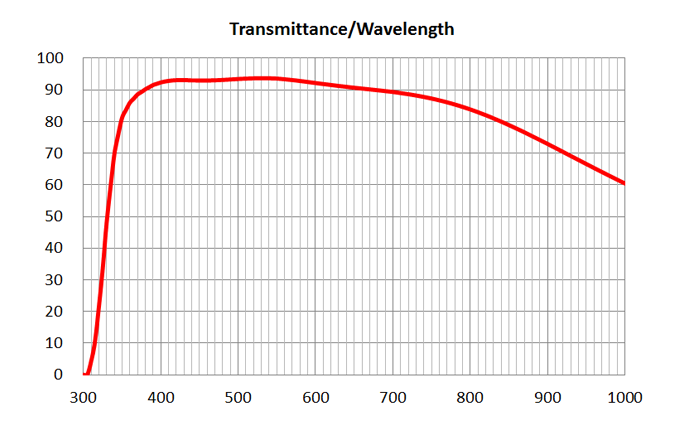
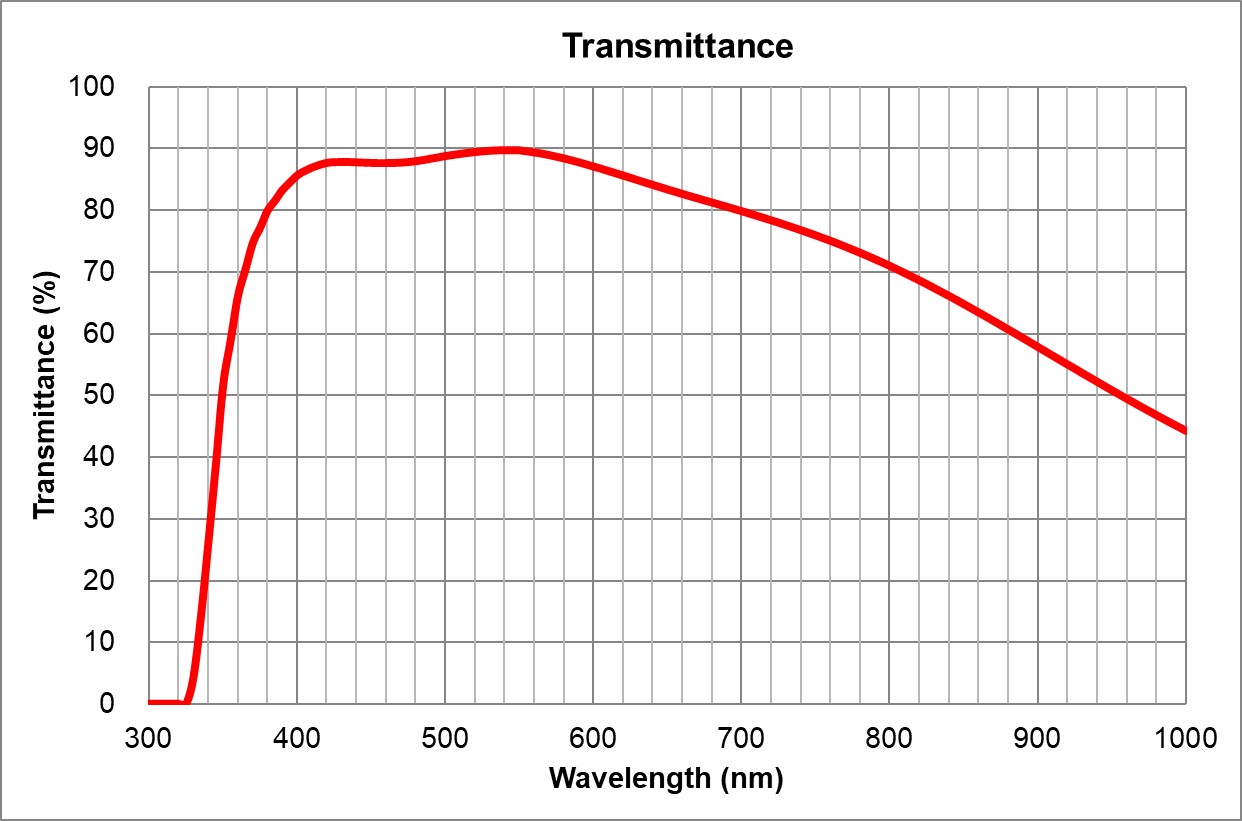
| 1 | 4x/0.16 Air | Olympus | 4x/0.16 Air UPlanSApo | 0.16 | Air | 16 | >90% at 550nm | BF, Fluo | - | |
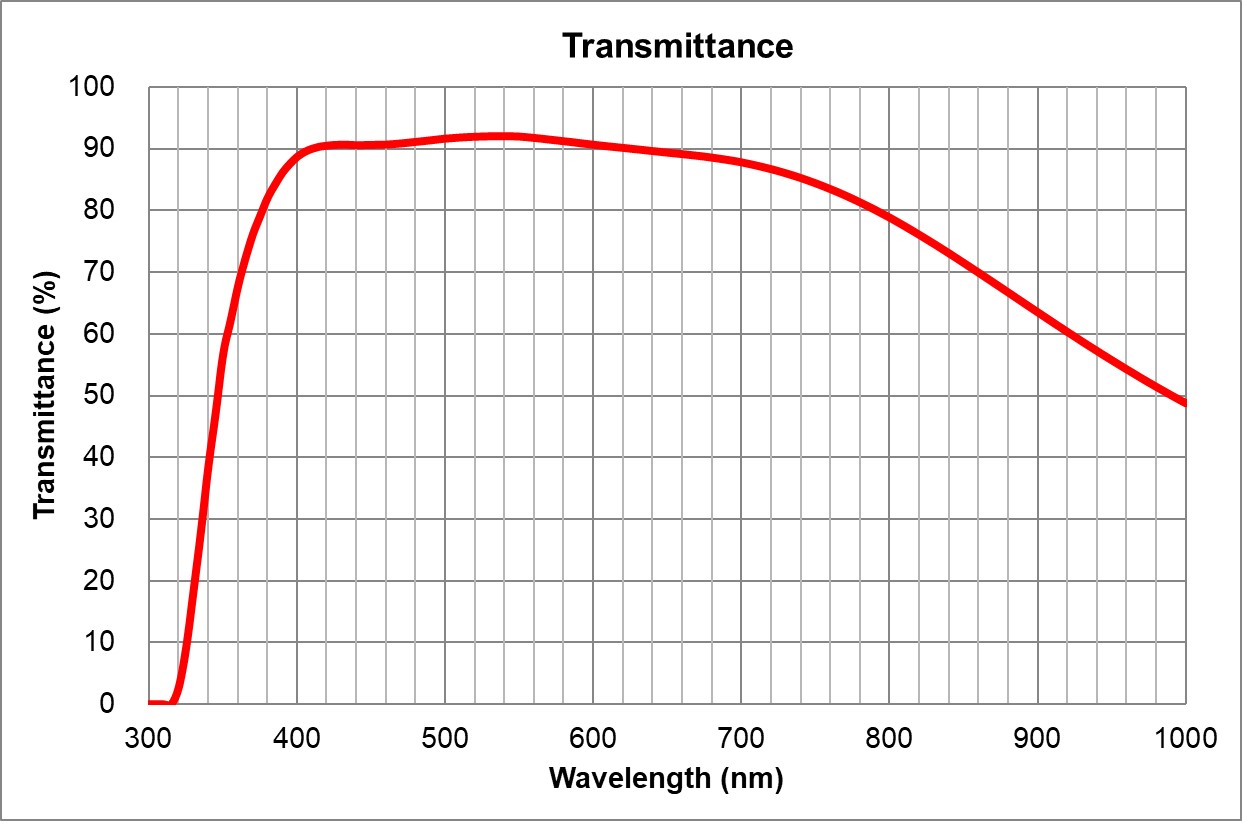
| 2 | 10x/0.4 Air | Olympus | 10x/0.4 Air UPlanSApo | UPLXAPO10X.pdf | 0.4 | Air | 3.1 | ~90% at 550nm | BF, Pol, DIC, Fluo | 0.17 |
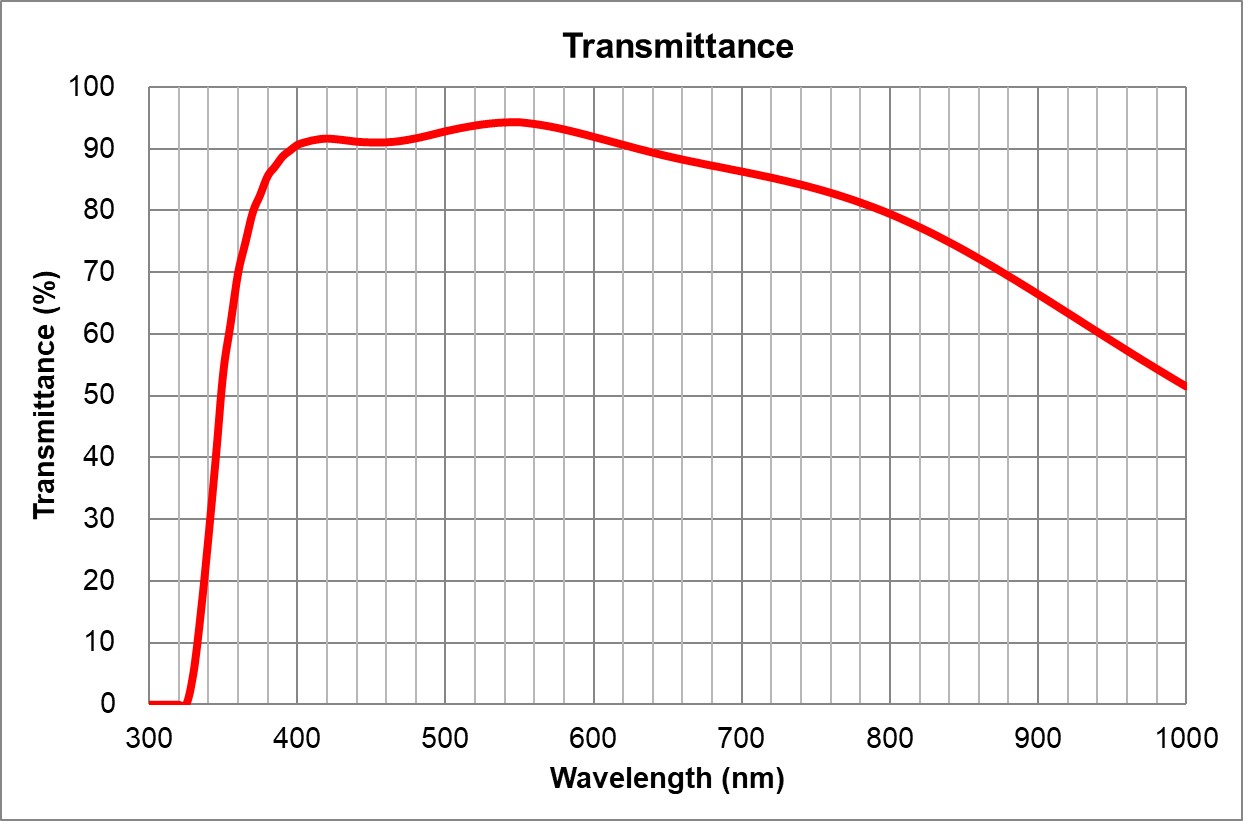
| 3 | 20x/0.75 | Olympus | 20x/0.75 Air UPlanSApo | 0.75 | Air | 0.6 | >90% at 550nm | BF, Pol, DIC, Fluo | 0.17 | |
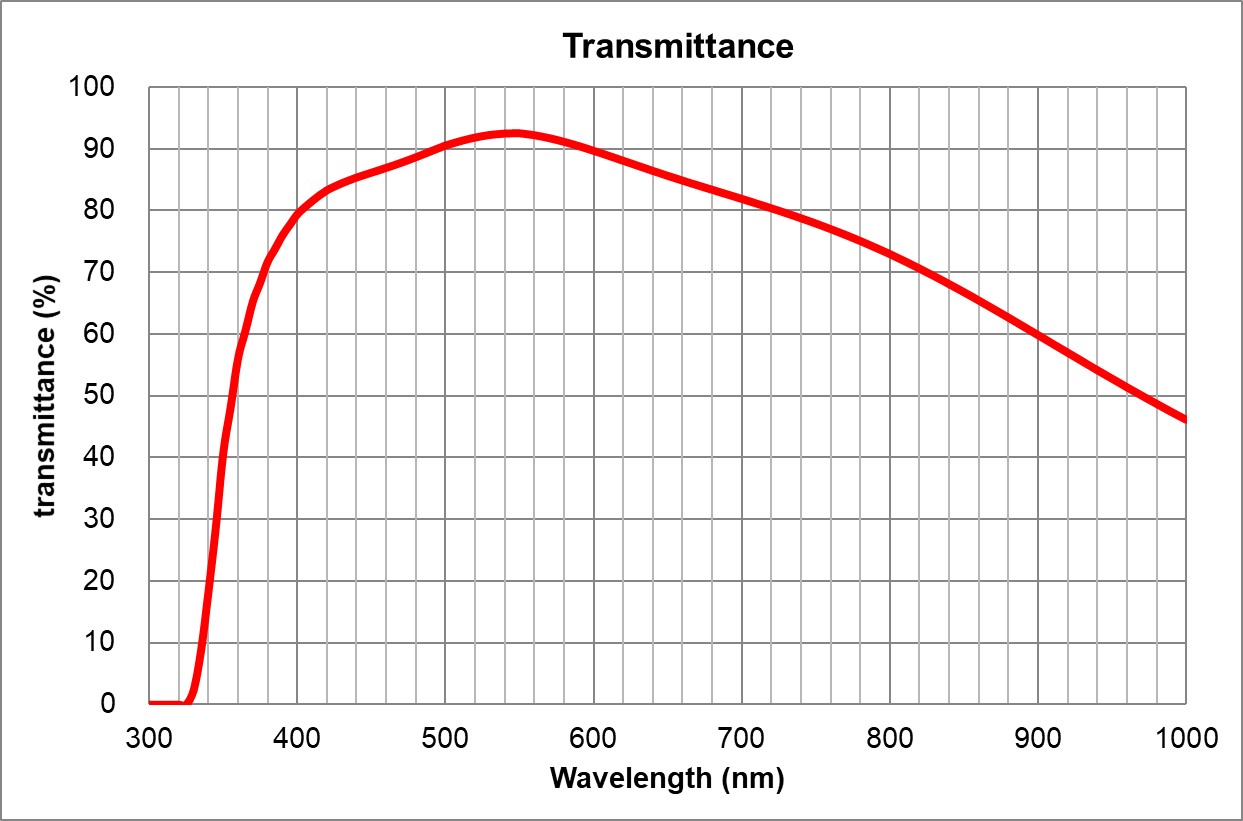
| 4 | 40x/0.95 Air | Olympus | 40x/0.95 Air UPlanSApo | 0.95 | Air | 0.18 | ~90% at 550nm | BF, Pol, DIC, Fluo | Adjustable 0.11-0.23 | |
| 5 | 60x/1.35 Oil | Olympus | 60x/1.35 Oil UPlanSApo | 1.35 | Oil | 0.15 | ~90% at 550nm | BF, Pol, DIC, Fluo | 0.17 | |
| 6 | 100x/1.4 Oil | Olympus | 100x/1.4 Oil UPlanSApo | 1.4 | Oil | 0.13 | ~90% at 550nm | BF, Pol, DIC, Fluo | 0.17 | |
| 7 | Vide |

BF: Bright-field
Pol: Polarized light
DIC: Differential interference contrast
Fluo: Fluorescence
Filters
- Empty
- DAPI
- FITC
- TRITC
- mCherry
- Empty
- Empty
- U-FDICT DIC Analyzer (Nomarski prism)
| Position | Name | Brand | ID | Excitation Filter | Dichroic mirror | Emission Filter | Comments |
|---|---|---|---|---|---|---|---|
| 1 | Empty | ||||||
| 2 | DAPI | Olympus | U-FUNA | 360-370 | 410LP | 420-460 |
|
| 3 | FITC | Olympus | U-FBNA | 470-495 | 505LP | 510-550 |
|
| 4 | TRITC | Olympus | U-FGWA | 530-550 | 570LP | 575-625 |
|
| 5 | mCherry | Olympus | U-FYW | 540-585 | 595LP | 600LP |
|
| 6 | Empty | ||||||
| 7 | Empty | ||||||
| 8 | DIC Analyzer | Olympus | U-FDICT DIC | - | - | - | DIC Analyzer |


Detector
Olympus DP80 Dual sensors (color and monochrome) CCD camera, 6.45 x 6.45 um pixel size,15 images/s at full frame 55% QE at 550nm
Color mode 4080 x 3072 pixels, 24-bit
Monochrome mode 1360 x 1024 pixels, 14-bit
Olympus_DP80 Camera_User Guide.pdf
The following schematics depict the light path for transmitted (bright-field and Phase Contrast) and reflected (fluorescence) lights.
Available manuals
- Database_Manual_cellSens_en.pdf
- Hardware_cellSens_en.pdf
- Install_cellSens_en.pdf
- Manual_cellSens_en.pdf
- X-Cite_NOVEM_Brochure.pdf
- X-Cite_NOVEM_Filter_Recommendations.pdf
- X-Cite_NOVEM_Filter_Recommendations_for_FISH.pdf
- X-Cite_NOVEM_Quick_Start_Guide.pdf
- X-Cite_NOVEM_User_Guide.pdf
- Olympus_DP80 Camera_User Guide.pdf
Stand
- Olympus BX63 Serial 0G00080
Condenser
- Motorized condenser
Camera
- Olympus DP80 Serial 8K48090
Stage
- Motorized stage SHe Serial 127808
Workstation
- HP Z4 Workstation
- Intel Xeon W-2102 @ 2.9GHz
- RAM 32 GB DDR4 2400 MHz
- OS 1 TB GB SSD 550 MB/s
- 2 TB HD Data Storage (2 x 1 TB spanned volume) 162 MB/s
- Video Card nVidia Quadro P620 2GB DDR5 dedicated memory
- Monitor Dell P2415Q display 24' 3840 x 2160
- Software CellSens Dimension v3.2
Consumables
Troubleshooting
FAQ
